Remote Computing and Bash Tutorials
Bioinformatics Toolkit for Genomics Analyses
2026-04-08
1 Introduction
This webpage provides tutorials introducing remote computing and command-line tools commonly used in genomics and bioinformatics. The tutorials focus on practical workflows using Linux computers running the Ubuntu distribution.
The material presented here is especially relevant for:
These tutorials will help you develop the computational skills required to connect to remote computers, manage long analyses, and navigate the command-line environment used in genomics research.
2 Learning Outcomes
After completing these tutorials, you will be able to:
- Remotely access Linux computers using the
sshprotocol. - Safely run long analyses (aka computer jobs) using
tmuxsessions. - Use common Bash command-line tools to organize files and perform genomics analyses.
3 Workflow
These tutorials are organized to guide you through the essential steps required to work on remote Linux systems and perform genomics analyses using the command line.
The material is structured into the following sections:
Remotely access Linux computers
In this section, you will learn how to connect to remote computers using thesshprotocol and understand the basic concepts required for secure remote access.Safely run computer jobs
This section introduces thetmuxtool, which allows you to run and manage long computational jobs in persistent terminal sessions.Bash command-line reference
This section provides a practical overview of commonly used Bash commands for navigating the file system, managing files, and supporting genomics analyses.File Exchange
This section provides a practical overview of how to conduct file exchange using FileZilla.Group Exercises 1: Building a Shared Bioinformatics Workflow
This section provides group activities to help you learn and master skills related to remotely accessing Linux computers, running safe jobs, and using Bash commands.Group Exercises 2: File Exchange Using FileZilla
This section provides group activities to help you learn how to transfer files between your computer and a remote server.
4 Groups
4.1 Group Organization and Structure
Each group is composed of 5 to 6 students, with a mix of undergraduate and graduate students to promote peer learning and knowledge exchange.
Each group is divided into two subgroups (A and B). Both subgroups will perform the same analyses in parallel, working independently at first.
This structure is designed to:
- Encourage fact-checking by comparing results between subgroups
- Improve accuracy and reproducibility
- Build confidence in computational results through independent validation
4.2 Group Accounts
Each group has been assigned two accounts:
- One account for Subgroup A
- One account for Subgroup B
Each subgroup must use its assigned account to complete the group activities.
You will access the Linux systems using the ssh protocol. Details on your account information are available here.
4.3 Group Collaboration Guidelines
- Each subgroup works independently using its assigned account
- Analyses are conducted in parallel by Subgroup A and Subgroup B
- All accounts within a group share the same computational resources
- Coordinate within your subgroup to avoid conflicts when running intensive jobs
- After completing tasks, compare results between subgroups to verify accuracy
- Discuss and resolve any discrepancies before moving forward
4.3.1 Technical Notes
- All accounts use the same password for simplicity
- Accounts have access to the bioinformatics software required for the course
- File permissions allow collaboration within each account environment
- Contact the instructor if you experience connection issues
5 Remotely Access Computers
To remotely access your assigned Linux computer accounts using the ssh protocol, you need the following information:
- Your user ID and password (see the Google document).
- The IP address of the computer you want to connect to.
If you want to remotely access the lab computers from a Windows machine, please read the protocol described below before continuing.
Important: If you are accessing the Linux computers outside of the BSU campus network, you will need to connect through the BSU VPN.
5.1 What is an IP Address?
An Internet Protocol (IP) address is a numerical label assigned to each device connected to a computer network that uses the Internet Protocol for communication.
An IP address serves two main functions:
- Network interface identification
- Location addressing
5.2 How to Find the IP Address?
The procedure summarized here shows how to retrieve a computer’s IP address on the Ubuntu operating system (Figure 5.1):
- Open the
System Settingsapplication from the desktop sidebar. - Select the
Networktab located under the Hardware section. - Select the
Wiredtab. - The computer’s IP address appears under the IPv4 Address field.
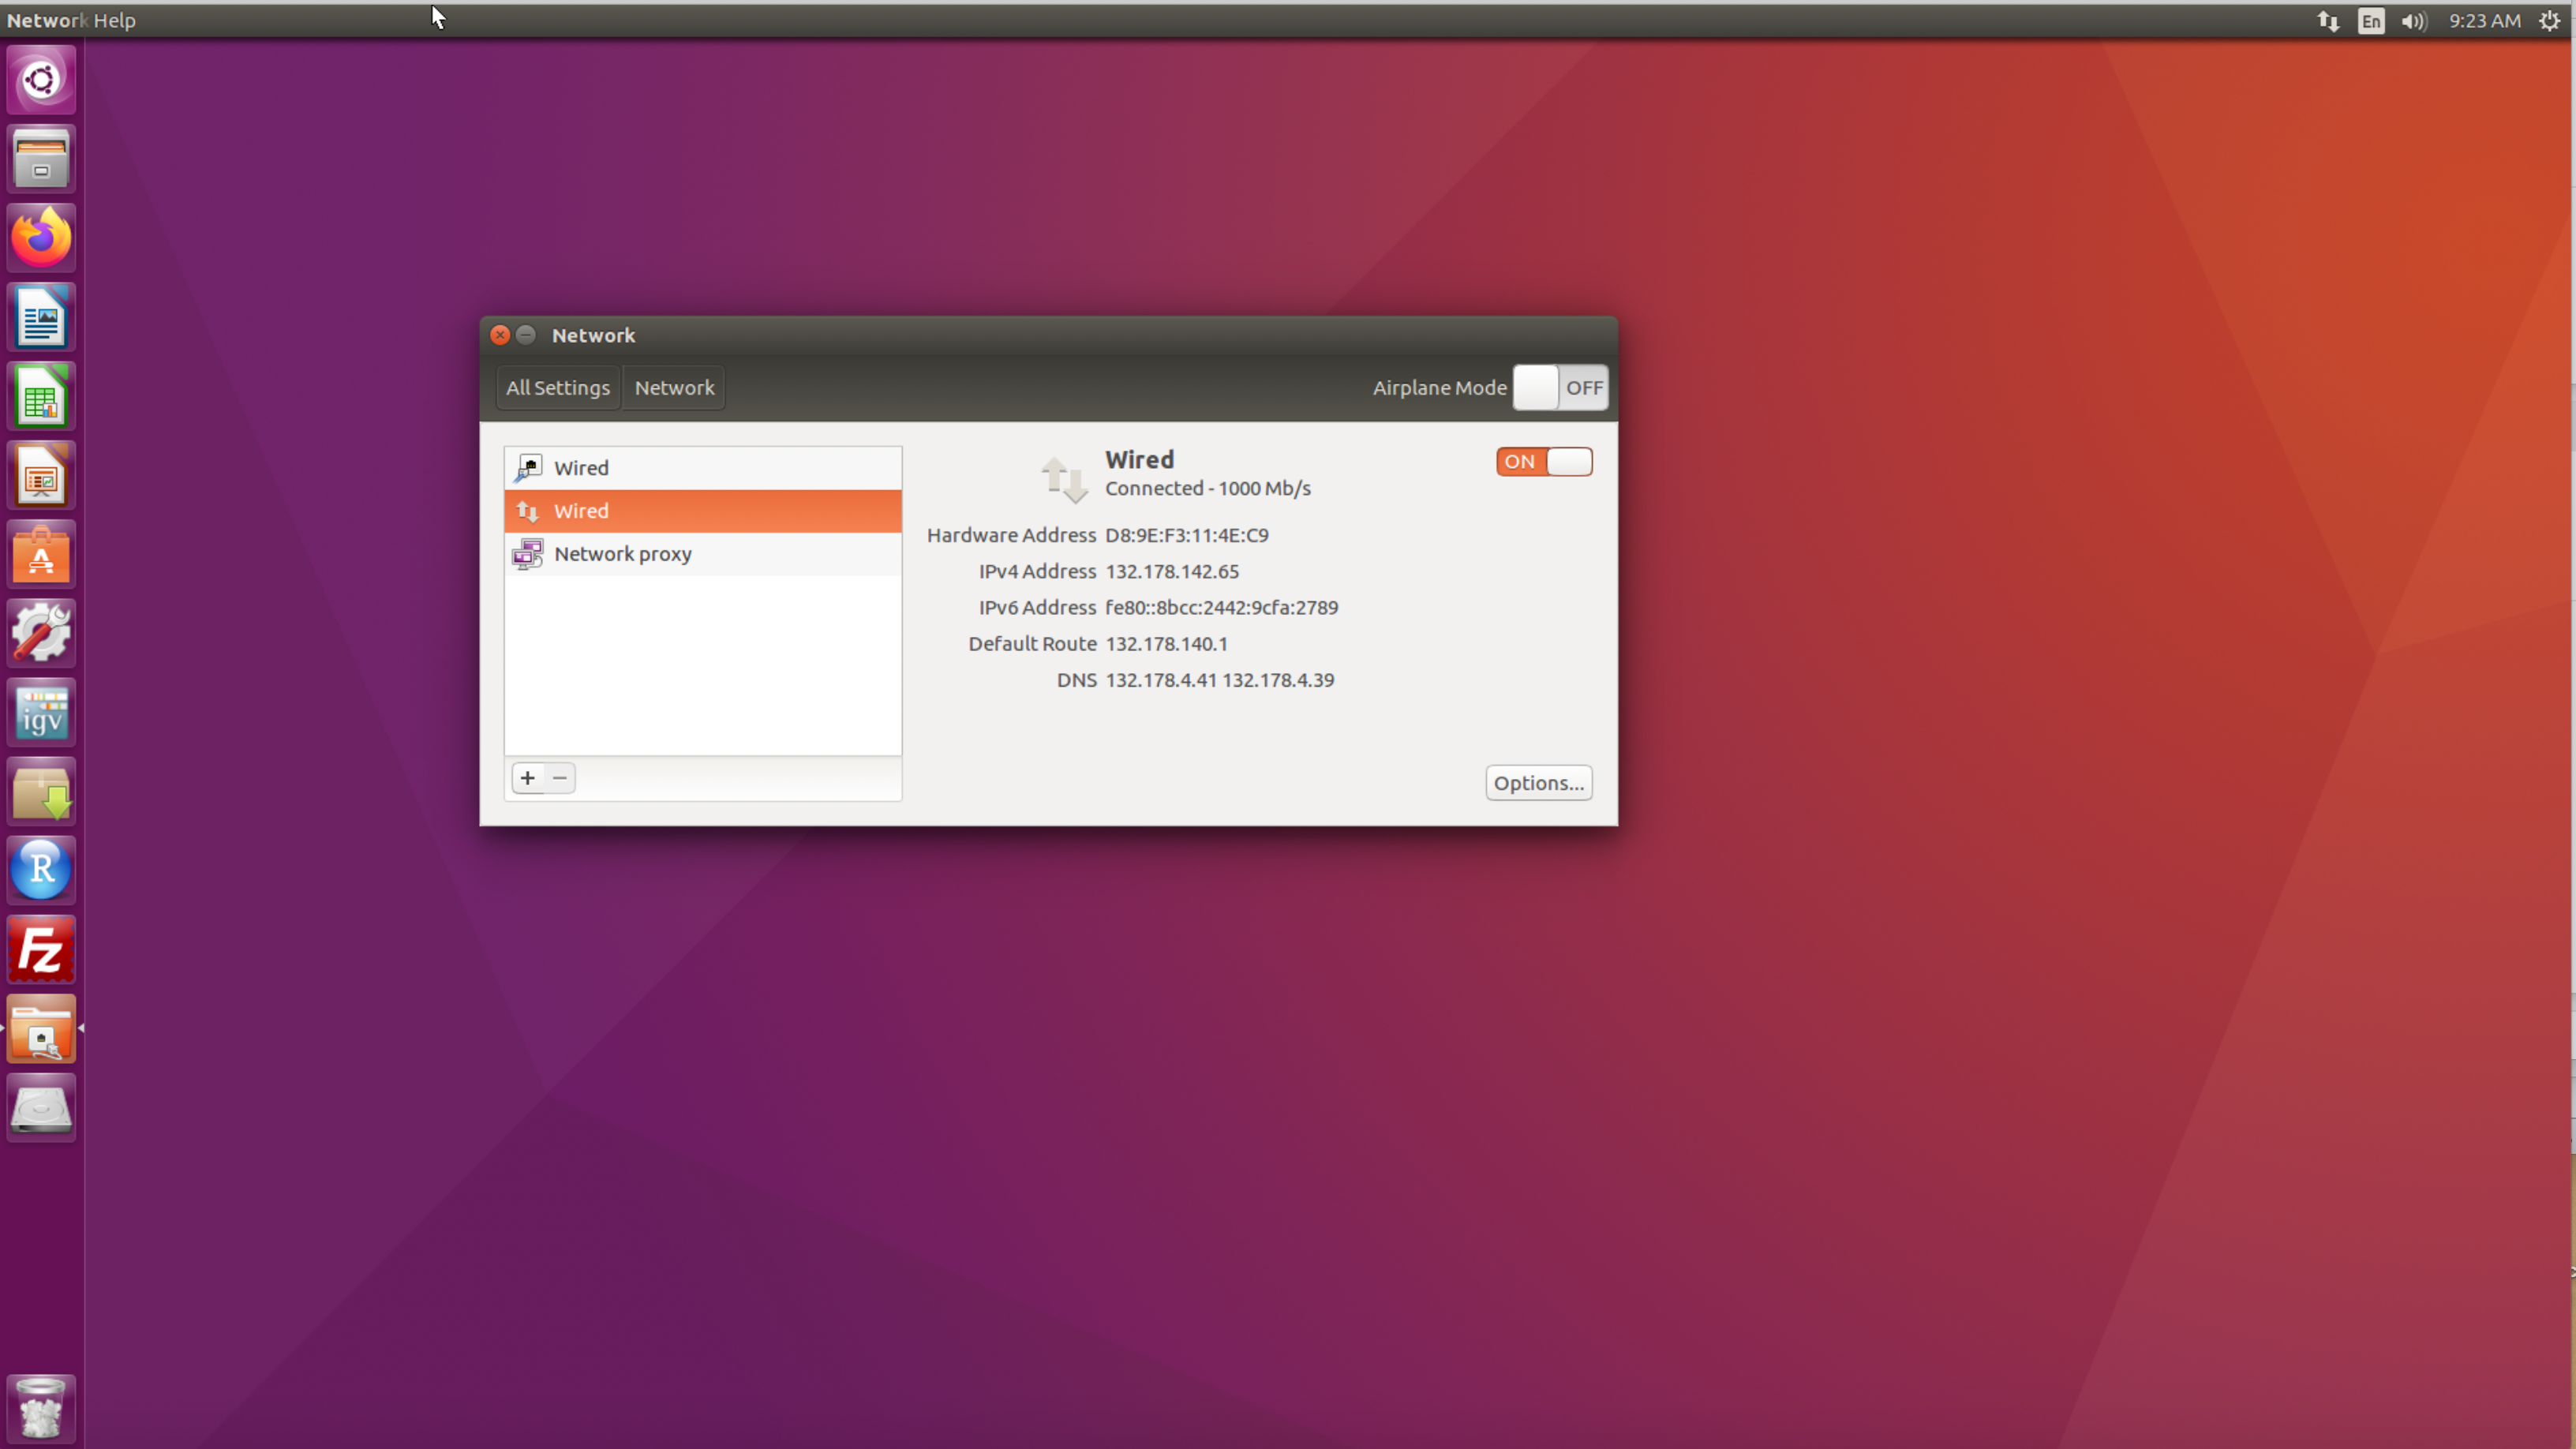
Figure 5.1: Screenshot of Ubuntu desktop showing how to retrieve the IP address.
5.2.1 Command Lines to Get the IP Address
You can also retrieve the IP address from the command line by typing the following commands in a Terminal:
# Get IP address
hostname -I | awk '{print $1}'
ip a
ifconfig -a
5.3 The ssh Protocol
The Secure Shell (ssh) protocol is a method used for secure remote login from one computer to another (Figure 5.2).
It protects communication using strong encryption and allows users to remotely execute commands on another machine.
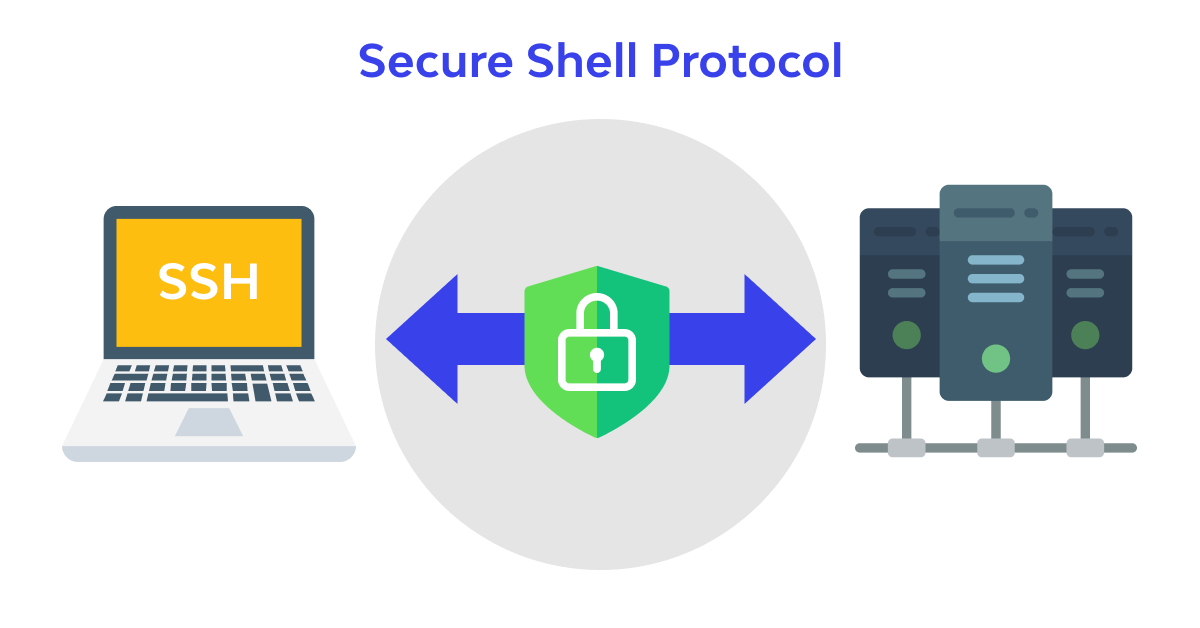
Figure 5.2: Overview of ssh protocol.
Once you have gathered the required information (IP address and username), open a Terminal and type:
# General command
ssh USER_ID@IP

# Example
ssh bioinformatics@132.178.143.53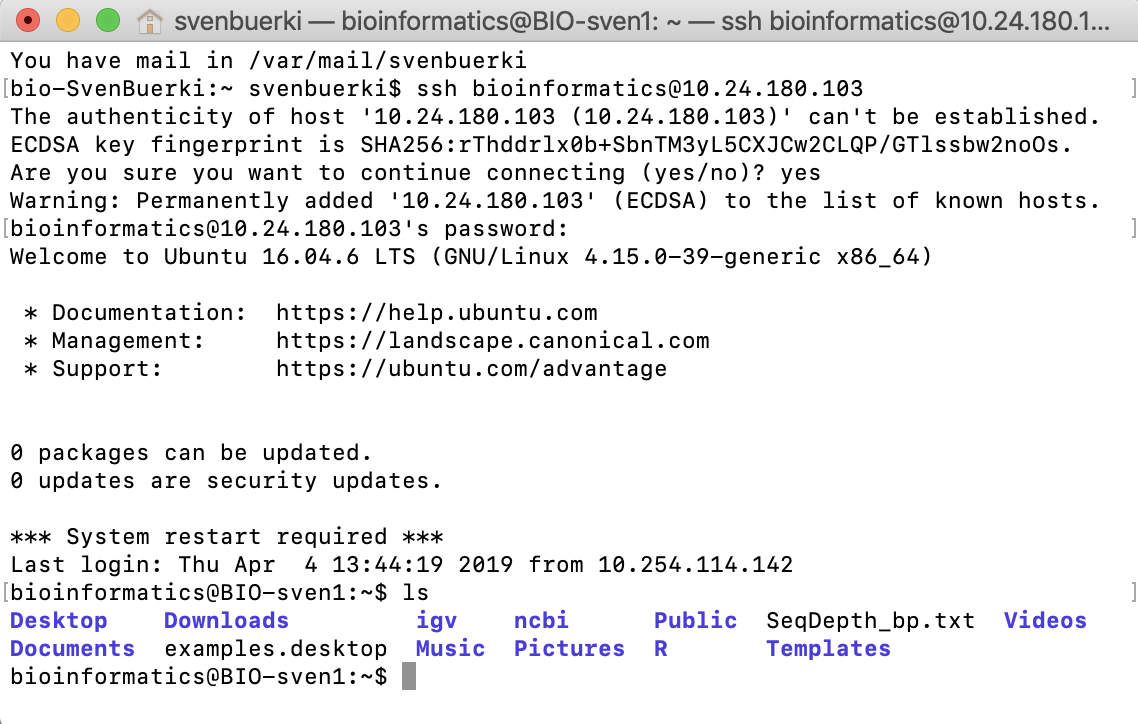
Figure 5.3: Example of an ssh connection from a Terminal.
5.4 Install Putty on Windows
If you are using Windows, you can use Putty to establish SSH connections.
Download the software here: http://www.putty.org
When launching Putty (Figure 5.4):
- Enter
user@IPin the Host Name field. - Set Port to
22. - Select SSH as the connection type.
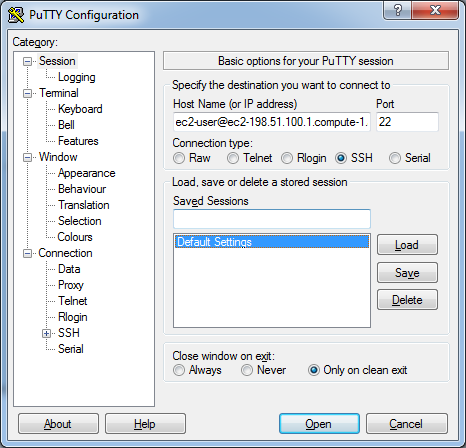
Figure 5.4: Putty configuration window.
6 Safely Run Computer Jobs
Some analyses performed in genomics can take several hours or even days to complete. To avoid interrupting these analyses, it is important to run them in a persistent terminal environment.
The tool we will use for this purpose is tmux, which allows multiple terminal sessions to run simultaneously.
6.1 The tmux protocol
tmux is a terminal multiplexer for Unix-like systems.
It allows users to create multiple independent terminal sessions within a single window.
Key advantages:
- Run long analyses safely
- Disconnect from a remote computer without stopping jobs
- Manage multiple command-line tasks simultaneously
6.1.1 Install tmux on Mac
brew install tmux6.2 How to Operate tmux Sessions
6.2.1 Create a New Session
tmux6.2.2 Detach from a Session
Press:
Ctrl+b then d6.2.3 Reattach to a Session
tmux attach6.2.4 Create and Name a Session
tmux new -s JOB16.2.5 List Sessions
tmux list-sessions6.2.6 Attach to a Specific Session
tmux attach -t JOB16.2.7 Kill a Session
tmux kill-session -t JOB1Warning: Killing a session will terminate any running analysis.
7 Bash Command-Line Reference
Below is a collection of common Bash commands used to navigate the file system and manage computational analyses.
7.1 File System
ls— list files in a directory
cd— change directory
pwd— print working directory
mkdir— create a directory
rm— remove a file
cp— copy files
mv— move or rename files
cat— display file contents
less— view files page by page
head— show the first lines of a file
tail— show the last lines of a file
7.2 System
whoami— display current userdate— display date and timeexit— exit terminaldf -h— disk usagefree— memory usage
7.3 Process Management
ps— list active processestop— show running processeshtop— interactive process viewerkill PID— terminate process
7.4 Networking
ssh user@host— connect to remote hostscp— transfer files between machineswget— download filescurl— download files
7.5 Searching
grep— search text patternsfind— locate filessed— text substitution
7.6 Compression
tar— archive filesgzip— compress files
8 File Exchange
8.1 Learning Objectives
By the end of this section, you will be able to:
- Explain what SFTP is and why it is used
- Connect to a remote server using FileZilla
- Transfer files between your local computer and a remote system
- Verify successful file transfers
8.2 Why File Transfer Matters
In bioinformatics, analyses are often conducted on remote computing systems, while data visualization and reporting are performed locally. Efficient and reliable file transfer is therefore essential for:
- Moving input datasets to remote systems
- Retrieving analysis results
- Sharing files between collaborators
Developing good file management and transfer practices is critical for ensuring reproducibility and data integrity.
8.3 What is SFTP?
SFTP (Secure File Transfer Protocol) is a network protocol used to securely transfer files between your local computer and a remote server.
Unlike older file transfer methods (such as FTP), SFTP encrypts both the data and the login credentials during transmission. This ensures that your files and passwords are protected from unauthorized access.
8.3.1 Key Features of SFTP
- Secure communication: All data is encrypted
- Authentication: Requires a username and password (or SSH key)
- Reliable transfers: Reduces the risk of data corruption
- Integration with SSH: Uses the same protocol as
ssh(port 22)
8.4 SFTP in FileZilla
FileZilla is a graphical SFTP client that simplifies file transfer between your computer and a remote server.
When you connect using FileZilla:
- You are using SFTP by default (when connecting via port
22)
- Your connection is secured using the same system as your
sshlogin
- You can upload and download files using a drag-and-drop interface
8.4.1 Why SFTP is Important in Bioinformatics
- Protects sensitive datasets and research results
- Ensures secure access to remote computing systems
- Enables efficient transfer of large genomic datasets
In this course, you will use SFTP through FileZilla to move data between your local computer and remote Linux systems.
8.5 Download and Install FileZilla
FileZilla is a free, open-source SFTP client available for Windows, macOS, and Linux.
8.5.1 Steps
- Go to the official FileZilla website:
https://filezilla-project.org/ - Click Download FileZilla Client
- Select the version for your operating system:
- Windows
- macOS
- Linux
- Windows
- Run the installer and follow the installation instructions
- Launch FileZilla after installation
Notes:
- Select the FileZilla Client, not the Server version
- Avoid installing optional bundled software if prompted
- Administrator privileges may be required
8.6 Connecting with FileZilla
8.6.1 Connection Details
To connect using FileZilla, you will need:
- Host: your remote server address
- Username: your assigned account
- Password: your assigned password
- Port:
22(SFTP)
8.6.2 FileZilla Interface Overview
Once connected, the FileZilla interface is divided into several panels:
- Quickconnect bar (top): Enter host, username, password, and port
- Left panel: Local file system (your computer)
- Right panel: Remote file system (server)
- Bottom panel: File transfer queue and status
8.7 Good Practices for File Transfer
- Always verify files after transfer (e.g., check file size or contents)
- Use clear and consistent file names
- Keep your directories well organized
- Avoid overwriting important files unless intended
- Transfer only necessary files to reduce clutter
9 🤝 Group Exercises 1: Building a Shared Bioinformatics Workflow
9.1 Learning Outcomes
These exercises reinforce:
- Remote computing skills (
ssh) - Linux navigation and file management
- Safe job execution using
tmux - Collaborative bioinformatics workflows
9.2 Activity Overview
In this 50-minute group activity, you will work in groups of 5–6 students, divided into two subgroups (A and B), to build and manage a shared bioinformatics workspace on a remote Linux system.
Through this activity, you will:
- Practice connecting to a remote system using
ssh - Navigate and manage files using essential Linux commands
- Collaboratively create and organize a shared working directory
- Create, verify, and delete files within a shared environment
- Use
tmuxto safely run and manage persistent computational jobs - Develop communication and coordination skills required in real-world bioinformatics workflows
This activity is designed to simulate how bioinformatics teams collaborate on shared computing infrastructure. You will experience the importance of clear communication, careful file management, and responsible use of shared resources.
By the end of this session, you will be prepared to confidently work on remote systems, manage your own analysis environment, and collaborate effectively on computational genomics projects.
9.3 Materials
- Your Computer Accounts
- How to Remotely access Linux computers
- Ho to Safely run computer jobs
- Bash command-line reference
9.4 Instructions
These exercises are designed to simulate real-world bioinformatics collaboration.
You will work in:
- 3 groups (5–6 students each)
- Each group has:
- 2 accounts
- 1 per subgroup (A and B)
⚠️ Important:
- Only ONE terminal session per subgroup
- You must coordinate, communicate, and trust each other
- Mistakes affect everyone — just like in real research
9.5 Phase 1 — Establishing Access (Trust & Communication) (15 minutes)
Goal: Successfully access your shared system
9.5.1 Tasks
- Connect to the remote server using
ssh. See here for account details. Once you have gathered the required information (IP address and username), open a Terminal and type (see here if you use Putty):
# General command
ssh USER_ID@IP

# Example
ssh bio_40@132.178.143.53- Confirm your identity and current directory:
# Retrieve your username
whoami

# Retrieve your current path
pwd- Exit the
sshconnection:
exit👉 Deliverable: Shared notes describing the login procedure
9.8 Phase 4 — Reflection (Building Trust) (5 minutes)
9.8.1 Group Discussion
- What worked well in your collaboration?
- Where did communication break down?
- Did you trust the other subgroup?
- What would happen in a real research project?
10 🤝 Group Exercises 2: File Exchange Using FileZilla
10.1 Learning Outcomes
By completing these exercises, you will be able to:
- Transfer files between your local computer and a remote Linux system
- Connect to a remote server using an SFTP client (FileZilla)
- Organize files for bioinformatics workflows
- Verify successful file transfers
10.2 Activity Overview
In this 25-minute group activity, you will work in groups of 5–6 students, divided into two subgroups (A and B), to learn how to transfer files between your local computer and the remote system, and verify file integrity.
The key takeaways from this activity are as follows:
- File transfer is a critical component of bioinformatics workflows
- Always verify file integrity after transfer
- Maintain clear file naming conventions to avoid confusion
- Combine graphical tools (FileZilla) with command-line tools for flexibility
10.3 Tasks
10.3.1 Prepare a File Locally
Each subgroup should:
- Create a simple text file on your computer (e.g.,
groupA_test.txtorgroupB_test.txt) - Add the following content:
This is a test file for file transfer.
Subgroup: A or B
10.3.2 Upload the File to the Remote Server
Using FileZilla:
- Navigate to your home directory on the remote system
- Upload your file into the folder:
~/Tutorial_genomics10.3.2.1 Steps
To upload your file to the remote server, do the following steps:
10.3.3 Verify the File on the Remote System
Connect via ssh and run:
cd ~/Tutorial_genomics
ls -lh
cat groupA_test.txt   # or groupB_test.txt
10.3.4 Modify and Download the File
- Edit the file on the remote system using a command-line editor (e.g.,
vim,nano):
vim groupA_test.txt- Add one additional line, save, and exit
10.3.5 Download the Updated File
- Use FileZilla to download the modified file back to your local computer
10.3.6 Confirm Changes Locally
- Open the downloaded file
- Verify that your modification is present
10.3.7 Discussion
- What are the advantages of using FileZilla compared to the command line?
- When would command-line tools (e.g.,
scp,rsync) be preferable? - How can file mismanagement impact reproducibility in bioinformatics?
10.3.8 Next Step
Use the protocol you just learned to transfer the ORF map from Module 2 to your local computer.